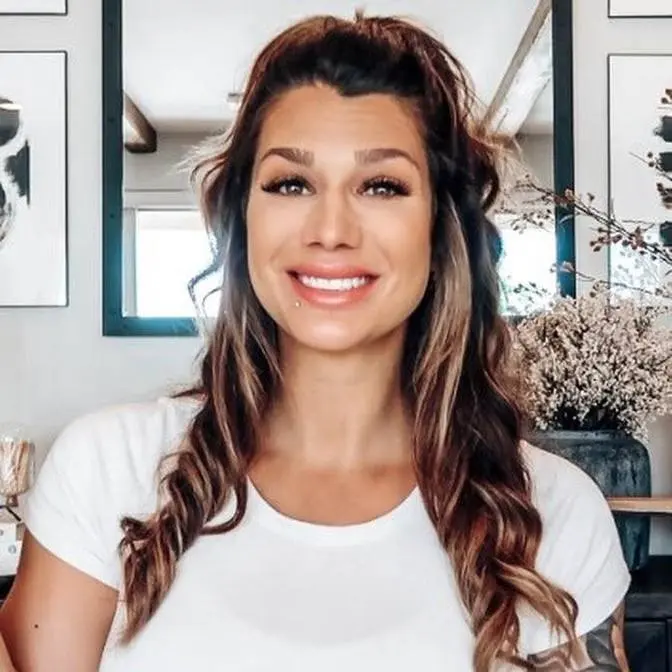
Good afternoon MWM family! Today’s video it’s another random home hacks video. I composed a small list of items, products, and best practices I use within my home. I hope you enjoy!
Welcome back to my channel.
If you are new, welcome.
My name is Hannah and I'm the mom with muscle and in today's video, we are doing another
video on some fun home hacks.
So if this is something you're interested in watching, just keep on watching.
But if you haven't already though, please be sure to like comment and subscribe.
You don't hit that bell button for every time I upload a video.
And if you're not already following me on Instagram, I would love to have you over at
mom with muscle.
Without further ado, let's get into this video.
So I have done a few of these home hacks here on my channel and it's funny as I'm like kind
of going through life and doing different things around my house, I'm like, Oh, that
would be a great thing to share on my YouTube channel.
So I typically will just write down these kind of home hacks and kind of compose a list
to put a video together for you guys.
So these hacks are 100% random.
There is no rhyme or reason to them.
Again, they are just things that come into my mind while I'm doing them around my house
and I figured let's make another video.
So you guys seem to like this sound off in the comments.
Do you guys like home packs?
If you guys use these at home hacks already in your home, without further ado, let's get
into this video.
So the very first hack on this list is using water for your faux stems.
Now I can explain as this probably sounds crazy, but sometimes when I style my home,
I will put my faux stems in a glass container.
Now to make it look not as faux, I will put just a hair bit of water at the bottom of
the vase to give the appearance that my stems are real looking.
And let me tell you, this has elevated my styling in so many ways.
I've had a glass container on my kitchen island for the last few weeks with some stems and
a little bit of water at the bottom and it just gives the illusion of real live greenery.
And I've had those stems in water for a few weeks now and they are untouched.
There's nothing wrong with them and the water is still crystal clear.
This is just something I've kind of come across in my styling and I thought, you know what,
I'm going to give it a shot.
I'll be the guinea pig.
And to be honest, it has totally worked.
So this is kind of a hack.
If you have a bunch of faux stems, but you want to give the appearance of them to be
realistic looking in your home, again, you're going to just add a little bit of water at
the bottom of a glass vase, a vase that you can see through, not, you don't have to worry
about if you have a vessel that you don't even worry about that.
But if you have a glass vase that you're putting your faux stems on, just put a little bit
of water at the bottom and it's going to give the appearance that your stems are real.
So that's the first hack on this list.
The second hack is using Velcro strips for your cutting boards.
Now I get questions all the time on how do I make sure my cutting boards aren't falling
off of my backsplash on a daily basis.
And I have started using Velcro strips as a way to Velcro them to the backsplash to
prevent that type of falling from happening.
And I'm going to be honest, it has helped a ton.
They don't move at all.
I would recommend using a pretty heavy duty Velcro stip depending on kind of the weight
and the size of your cutting boards.
But I'm telling you, you can just Velcro it to the backsplash.
You can even double stack them so you can do your dominant cutting board against the
backsplash.
And then if you want to do a layering moment, you can also Velcro them all together.
That way they don't move.
And it's honestly has been a really great hack that I have recently implemented in my
home.
I figured I would give it a try because the ones kind of by my burners tend to move around
sometimes.
So I'm like, you know what?
I'm going to try this.
And indeed it works.
So this is the second tip is using Velcro to help keep your cutting boards from falling
over.
So that's the second tip on this list.
Now the third tip, which you guys have probably seen on many channels, but I recently have
done this in my home and that is elevating my trees.
I have about three faux trees.
No, I have like four faux trees.
No, shoot.
I've got like six faux trees.
Jeez Louise.
I'm, I'm a faux person besides the stems behind me, those are real, but for the most part
I stick to faux.
That is just my personal preference.
I can't seem to keep live things alive.
So I have a lot of faux trees in my home and one of the tips on this is just elevating
the tree by putting something at the base of your pot to give your tree height and then
stuffing around the faux base and putting moss on top.
Now I'm sure you guys have seen this multiple times on different channels, but I recently
have just done it to my olive trees and I'm telling you they went from a seven foot tree
to now a nine foot tree is totally elongated my ceilings.
It makes this tree just appear very grand and very just luxe and I don't know why it's
taking me so long to do this, but this has been a super simple tip that I have again
recently implemented here in my home.
So you, all you're going to do is take some sort of object, a paint bucket, something
that is sturdy for your faux tree to stand on, put it on top, fill around the base and
then put moss on top of that.
Now another little tip on top of that is if you are going to be using moss as a way to
top it, I would definitely recommend hair spraying that moss because as we know, moss
is very messy.
So just by me hair spraying that moss, it's making it just stay put where I want it to.
So that's kind of another tip on top of the first tip of just making sure you elevate
your tree when it comes to putting it in a faux vessel or faux pot inside your house.
So that is the third tip on this.
So this next tip, I don't actually have my example for it because they didn't get here
in time in order for me to film it.
I'm sure we have all experienced tapered candles and when they burn, they just drip wax everywhere.
And to be honest, it almost kind of deters me from ever wanting to light them because
they are messy, they get all over my surfaces and then it's just more of a hassle than just
leaving them alone.
So there is a company called Lucid and no, this is not sponsored, but this is a candle
that I have recently come across that is a dripless wax candle.
It is a real flame, it is a real wax candle and you burn them just like you would any
other candle and they don't drip.
You guys, this is like mind blowing.
We have elevated all of our home decor now that we have dripless candles.
It's incredible.
So if you are wanting like a tapered candlestick and you want to be able to light it, you want
to be able to enjoy it, which we all should, look up dripless candles by Lucid.
I will make sure to link all the information down below.
Again, this is not sponsored, but I recently came across this company and I was like, this
is so genius to be able to have the look without the mess.
That is tip number four on this hack list.
Tip number five.
If you have not heard of this stuff, you need this stuff in your life.
This is called museum wax.
Now this has changed my life in so many ways.
Essentially it is a wax and all it does is it makes sure your items stay put.
So in my example, I use this for my utensil drawer.
I have a bamboo organizer in which I have my forks, my knives, my spoons, and every
single time we open that drawer, that thing is shifting all over the place.
To be honest, it's annoying because then all your stuff's all over the place.
So all you have to do is just take a little handful of this, roll it up into a little
ball, put it on the bottom of the surfaces in which you want to stay put.
And I'm telling you guys, game changer.
So when you do open it, it does come with a little bamboo stick.
So all you have to do is just scoop the amount that is desired.
Again, roll it up in a little ball and put it on the surface in which you don't want
to go anywhere.
So you could use this on a mantle if you have open shelving, if you have stuff like that
where you don't want it to move around when you're opening a drawer.
This stuff is incredible.
I did get this on Amazon for fairly inexpensive.
So that is the next tip on my list.
The sixth tip on this list, oh my gosh, game changer, is the laundry detergent cup.
Now, for those of you who do laundry, which all of us do laundry, you'll fill up the cup
with laundry detergent, you'll put the detergent into the washer, and then you're stuck left
with this cup that's got residue of laundry detergent.
It's messy, it can get all over the place.
Guys, you throw the cup into the wash.
You throw the cup with laundry detergent into the wash, you run the cycle like you would
normally do, and when you open up the lid, the cup is completely clean of that detergent.
It is life-changing.
It's like the simple things like that that just make Chef's Kiss such a difference.
So again, you are going to take your laundry detergent cup, put your detergent into your
wash, throw the cup in there, run your cycle like normal, and when you open the lid, you're
going to have a perfectly clean detergent cup.
So that is the next tip on this list.
So the last and final three tips of this video have to do with folding clothing.
Now again, I told you guys this was going to be a random video, but I was like, you
know what?
I'm going to give you guys a little bit of an insight on how to fold certain items that
just are a little bit awkward, like a sports bra.
So for those of you who have not been with me very long, I used to work for Lululemon
for four years.
I was one of the lead merchandisers here in San Diego, where I learned a lot of tips and
tricks on merchandising things, putting things together, making things look cohesive, making
things look presentable, and within that time, I learned how to fold sports bras, I learned
how to fold sweatshirts, things you just don't think about on a normal basis.
So I'm going to be showing you guys some B-rolls of three different items for folding, how
to fold them, and how to make it just make more sense when you are putting your clothes
back.
And these have been game changers.
These are just tools in my toolbox that I took away when I did work for the company.
And do keep in mind, you guys, again, I worked for the company for four freaking years.
So when you guys see my examples, I have a ton of Lululemon leggings.
That was my uniform for four years on like a four to five day basis.
So that's why I have so much, so please keep that in mind.
Sports bras.
All you have to do, as you guys will see in my example, is you fold it in half, and then
you're left with this kind of dangling piece.
You're just going to flip that piece up like so, and then you will see in my example, you're
just going to roll it like a taco.
And when you store your sports bras, you're going to just line them up into little tacos.
That way you can see the pattern within your drawer, and I'm telling you, this just helps
to keep things very organized.
You can see all the colors, and I have used this, and it's been a very best practice.
It's been a good practice for just keeping my drawers a little bit more organized.
I can see what I have, and it's easy to just pick and choose what it is that I want to
wear.
So that's the first tip on sports bras.
Now the second one is going to be leggings.
Obviously I have a ton of leggings, but this could go hand in hand if you have jeans or
pants that you don't hang.
This is the infamous Lululemon fold.
It is very simple, but it just makes for a very clean fold when it comes to leggings,
long pants, anything that has a leg on it.
You're going to fold it just a little bit underneath the crotch area like so.
Here's where the pant leg comes, and there is obviously where the crotch is.
If you go too far, then you're going to have a little bit of an overlap, and it's going
to create more of a bulbous material there at the, I keep saying crotch, I'm sorry guys.
There's no other word.
I don't know what other word to put it, but this fold has been game changing for keeping
things organized again in my drawers, and it makes for a nice flat fold.
Try to implement this in your jeans as well, or any sort of pant.
So that is the next item we are folding.
So the final and last item on this hack list, as well as the items that we are learning
to fold, is your sweatshirts.
The sweatshirt hoods are very bulky.
Sweatshirts in general are a bulky item, especially when you are hanging.
So when you are wanting to maximize your space, when it comes to hanging them, all you're
going to do is just adjust the hood.
So in my b-roll, you guys will see, I flip the hood that it lays flat against the back.
It's kind of popped up, so that way when you are hanging your sweatshirts one by one, they
are all going to be sandwiched very, very seamlessly together, and honestly, it is game
changing.
Now if you do want to elevate it just a hair bit, you could always tuck that one arm that
hangs out into the kangaroo pocket if it is a sweatshirt that has that, but this has been
one of the biggest life-changing hacks when it comes to hanging my sweatshirts and hanging
my clothing.
It is such a great thing that I have learned from Lululemon, and it is something that I've
carried on into my everyday life, and I figured I would share it with you guys.
So that is the last tip and hack on this list.
All right, you guys, and that is it for today's video.
I hope you guys enjoyed coming along for my home hacks video, I think part three.
Like I said, I will just jot down ideas, I will jot down things that I do in my life,
items that I am using.
I love sharing that information with you all.
Sound off in the comments if you have heard of these hacks, or if there is maybe something
that you implement in your home that you want to share with me.
I think it is really great to just share that knowledge back and forth, and help each other
out, you know?
That's what it's all about.
So again, I hope you enjoy.
Thank you so much for being here, watching my videos, commenting, liking, you guys mean
so much to me.
I love you so much, and we will see you guys soon.
Peace.