
Ever since my sunny CSA was replaced by our shady backyard nearly 10 years ago, I’ve been dabbling in mushrooms. A gardener at heart, no dearth of direct sun could dampen my propensity to produce; and while I stumbled through the dos and don’ts of mycoculture, my wonder and appreciation for the incredible kingdom of Fungi has swelled to the point of bursting!
Fascinating, functional and often flavorful, fungi lead a mysterious existence, mostly hidden from sight. The thrill in cultivating them begins with this mystery, since you never really know when your quiet mass of mycelium will suddenly set fruit. The speed with which some mushrooms mature is truly astounding, and the striking beauty of others cannot be denied.
Add to that their incredible array of utility — not only for us, but also for our environment — and it’s no wonder that the magical moment when my mushrooms appear — seemingly out of nowhere — is something I practically drag people off the street to witness.
With a hope of inspiring the masses to grow more mushrooms, I want to share the simplest ways I’ve found to get good results. Some methods require a lot of patience, and some species are particularly particular, but there is an easy way to get almost-instant gratification: oyster mushrooms, grown on straw, in buckets!
Why grow oyster mushrooms?
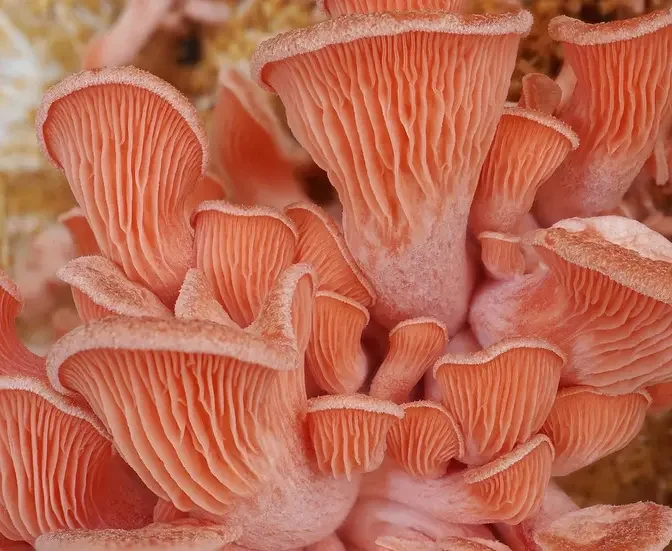
Oyster mushrooms get their name from their typical, seashell-shaped caps, which form beautiful clusters in a wide range of colors — including blue, gray, pink, yellow, black, white, and “pearl,” a common oyster variety of archetypal form. Growing oysters promises visual delight when they emerge, and a gourmet treat when they are harvested.
For the best of our weekly content!
You are now signed up for our newsletter
Check your email to complete sign up
Eating oysters is easy. These mild-flavored mushrooms can be used in soups, sautés, stir fries, casseroles, or even fried crispy like bacon. To get the optimum taste and texture from your oysters, try a dry-sauté.
Like many edible mushrooms, oysters are high in nutrition, low in calories, and provide excellent vegetarian protein. They offer many health benefits and are believed to have medicinal value. When exposed to sunlight, mushrooms absorb vitamin D, an important nutrient for maintaining mental and physical health.
Oysters are but one variety of mushrooms recognized for their immunity-boosting properties, and they are currently being studied for their potential anti-cancer effects. Part of their potency probably stems from the fact that they are strong and aggressive growers.
Unlike some other culinary mushrooms, oysters are quick to establish mycelium and can out-compete many contaminants. They are also adaptable to many growing mediums — two big bonuses in fungiculture!
Growing oysters in straw
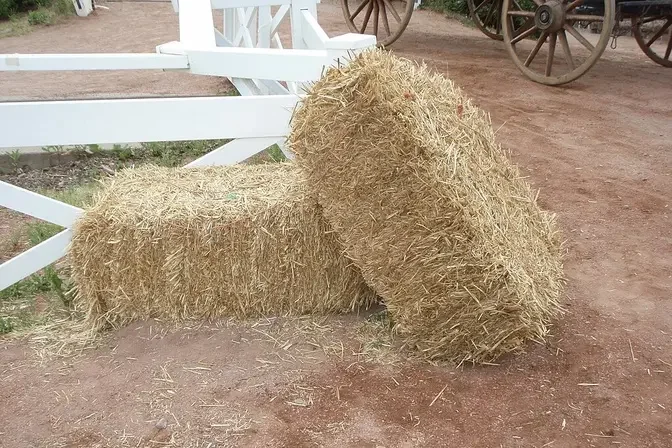
While oysters can be grown in a variety of media — including logs, sawdust, coffee grounds, and other organic materials — straw has always given me the most reliable results. A loose material with lots of surface area, straw ensures quick colonization, with fruiting bodies (mushrooms) possible in less than a month.
Some home-grown mushrooms require a sterile substrate, but oysters can be successfully grown on clean straw, pre-soaked in plain water — no sterilization necessary! The key is to keep the medium moist, which can be achieved by sealing the moisture in with plastic.
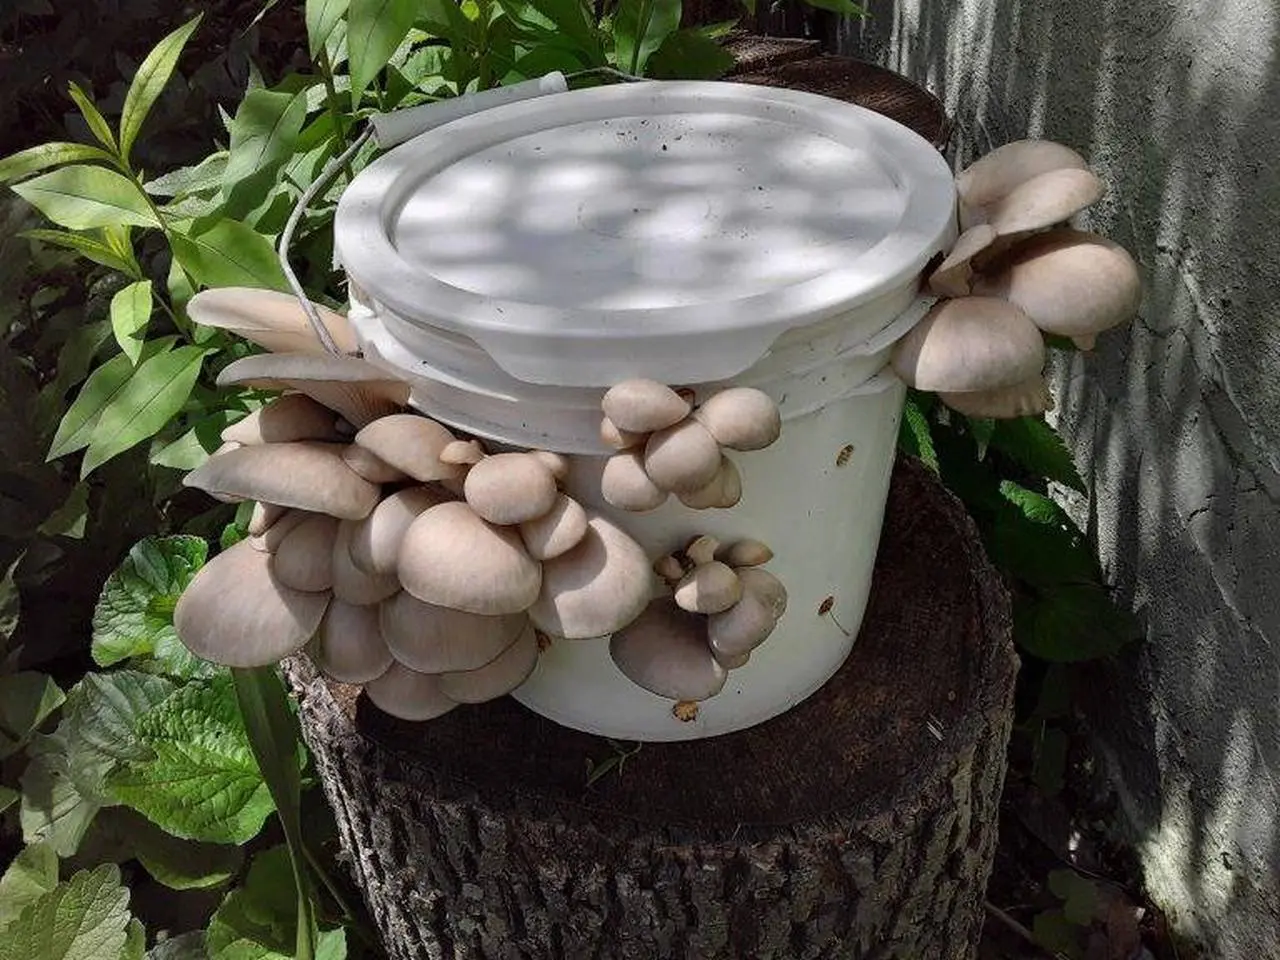
The beauty of buckets
Mushrooms are often grown in plastic “grow bags,” but they are not reusable, not-a-bit visually appealing, and they are fairly expensive. I prefer buckets for a few reasons. Buckets can be used many times; they look tidy and can be stacked neatly; and food-grade buckets can easily be obtained from food-service vendors at little or no cost.
Federal restrictions forbid reusing plastic buckets in commercial food service, so perfectly-good, five-gallon buckets are routinely thrown out in astonishing quantities. By repurposing these buckets you can feel good about keeping that bit of plastic out of a landfill.
If your local grocery has a fish department or a bakery, ask whether they can save you some buckets. If your local farmer’s market has a pickle vendor, ask whether you can take some of their empty buckets. Sandwich shops, too, will have pickle buckets. Fast food chains get buckets of pre-cut fries, and bulk-food stores get herbs and spices in smaller — but just as useful — buckets.
Making mushroom buckets
When you decide to grow oysters (Pleurotus sp.), you have many varieties to choose from. Take your current climate into consideration, as temperature plays an important part in your success. Snow oysters, as you might expect, prefer cool temperatures, fruiting in the 50-60°F (10-15°C) range. Blue, gray, and pearl oysters also like it relatively cool, at 55-70°F (13-21°C); but pink and golden oysters prefer warm weather, and fruit at 70-80°F (20-27°C).

Mushroom merchandise is increasingly available online, but if you have a local supplier, you should certainly support them. Look for grain spawn or sawdust spawn, as opposed to plugs — which are used to inoculate logs, or liquid cultures — which are used to make the spawn.
Spawn should amount to about 5-10 percent of your substrate material, so a five-gallon bucket of straw would want at least 2.5 lbs but not more than 5 lbs of spawn. As you might imagine, more spawn gives quicker, more-reliable results; but if all your other conditions are ideal, you can certainly get away with using less spawn.
Wet your straw in a large tub, or use buckets if you have extra. The water can be straight from the hose, but if you collect rainwater, that’s great, too! Use some heavy stones to help keep the straw submerged.
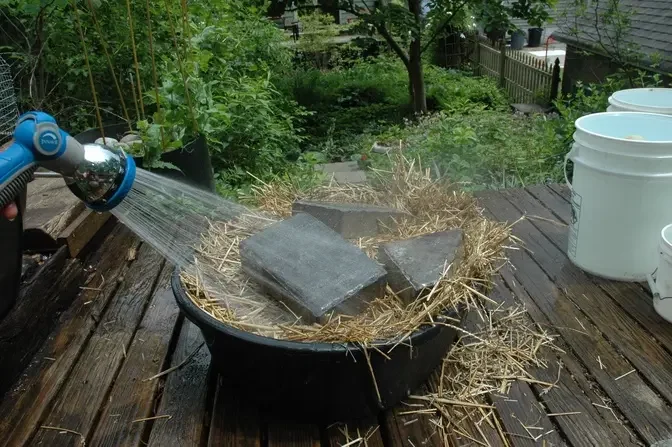
Allow the straw to soak for a couple hours at least, but not so long that it starts to ferment and stink. Strain off the liquid — which can be used on your plants as a gentle fertilizer.
Buckets should be clean, in good condition, and have tightly-fitting lids. They do not need to be sterilized or sanitized unless they previously contained a likely contaminant — such as mold.
With a ¼ to ½ inch drill bit, make holes all around the sides of the bucket. Use a staggered pattern to attain even spacing of about four to six inches apart.
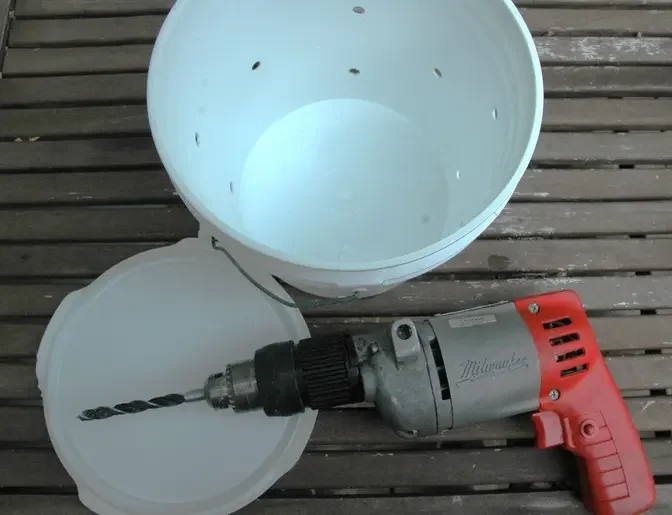
Pack a couple of inches of damp straw into the bottom, and then sprinkle a handful of oyster spawn. Repeat until the bucket is full, with a layer of straw at the top. Secure the lid, and then lay the bucket sideways for a while to allow any excess liquid to drain off.
When using five-gallon buckets, most of your mushrooms will come in one big flush over a period of a few days. If you prefer a steady supply of smaller amounts, spread out your spawn by using one-gallon pails — inoculating one per week. Most spawn can be kept in the refrigerator for months.
Mushroom bucket maintenance
Mushroom buckets are relatively easy to maintain. Place them in an area out of direct sunlight that will maintain temperatures within their preferred range. Whether this is outdoors, in a garage, in a greenhouse, or in a basement, keep the humidity level relatively high, misting regularly if necessary, and/or providing a loose cover to maintain a moist environment.
Most of the activity will take place behind the scenes. As the mycelium colonizes the substrate, a white filmy substance will eventually become visible through the holes in your bucket. After about three weeks, you can expect to see mushroom pinheads — which look exactly as you might expect — super cute, tiny mushrooms.
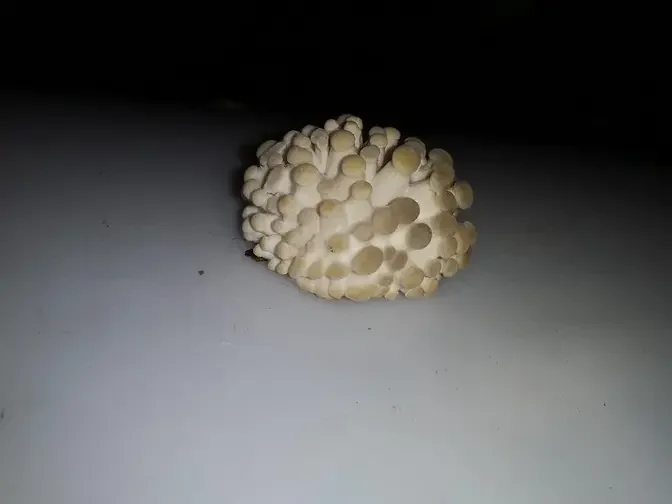
Pinheads are very susceptible to desiccation, so be sure to mist them periodically. Once they reach this stage they grow quickly. Believe it or not, within days, a large cluster of mushrooms can sprout out from that tiny hole. Ideally you want to harvest when you are ready to enjoy them, but don’t wait until they start to curl upward and get dry.